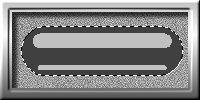
Step 1. Build the Frame
- Create new image. 200 wide x 100 high (Pixels), 16 million color, background white
- Download the Metallic gradient unzip it into your "My PSP8 Files/Gradients" folder (See below)
example: C:\Documents and Settings\username\My Documents\My PSP8 Files\Gradients
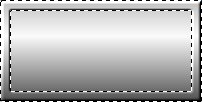
- Using the "Flood Fill" tool fill the complete image with the gradient as shown below.
- Settings: Style: Linear, Angle:0, Repeats:0, Invert: Checked

- Select complete image with [Ctrl-a]
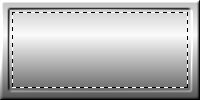
- Add a Selection Border with "Selection menu/Modify/Select Selection Borders"
- Settings: Check Inside, Check Anti-alias, Border width: 10

- Do an Inner Bevel with "Effects menu/3D Effects/Inner Bevel"
- Settings: Bevel:2, Width:3, Smoothness:3, Depth:5, Ambience:0, Shininess:0
Angle:315, Intensity:50, Elevation:30, Color: White
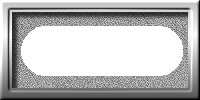
- Select the complete image with [Ctrl-a]

- Contract your selection with "Selection menu/Selections/Modify/Contract"
- Settings: Number of Pixels: 13
- Promote the background layer with "Layers menu/Promote Background Layer"
- Delete the image inside the selection with the [Delete] key.
- Remove the selection with [Ctrl-d]
- Drop a shadow with "Effects menu/3D Effects/Drop shadow"
Settings: Vertical:5, Horizontal:5, Opacity:70, Blur:6, Color: Black
HINT: When you see the checkered board you are looking through all layers.

- Create a new raster layer "Raster 2" with "Layer menu/New Raster Layer"
- Open the layers palette with [F8] key and slide "Raster 1" layer above "Raster 2" layer.
- Make the "Raster 2" layer active by LMB click on the name in the "Layer" Palette (Important).
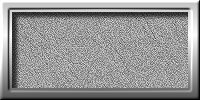
- Use the "Flood Fill" tool to fill "Raster 2" with the pattern called "Paper 5", Angle:0, Scale:100
- See optional step to the left.
- Rename Layers as shown below (RMB click on layer name in layer palette and select rename):
Raster 1 = Frame
Raster 2 = BG
Optional Step:
You may want to colorize your Raster 1 layer. This can be done by, "Adjust menu/Hue and saturation/Colorize.

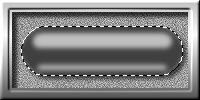
Step 2. Build the Button
- Let's change the way PSP displays the cursor so we can see where our white paint will go
before dropping the color.
- Open the Preferences dialog box with "File menu/Preferences/General Program Preferences"
- Go to the "Display and Caching" tab
- Check the "Use precise cursors" - I always use this option
- Check the "Show brush outlines" - This will aid us in seeing where the paint will apply
- Close the Preference dialog box with "OK" button.
- Turn on the Ruler display with [Ctrl-Alt-r] (This is a toggle on/off command)
- Turn on the Guide display with "View menu/Guides" (This is a toggle on/off command)
- Turn on the Snap to Guides option with [Shift-Alt-g] (This is a toggle on/off command)
- With LMB click & drag on the top ruler to place a horizontal guide at 50 pixels
- With LMB click & drag on the left ruler to place horizontal guides at 50 and 150 pixels
HINT: I find guides to be a handy tool. To adjust them to the exact pixel, RMB click on the handle. The handle is the rectangle that is laying on the ruler.

- Create a new raster layer named "Button" and place it on the top of the layer stack with it active.
- Select white for the foreground color in your Materials Palette (to open palette use [F6] key)
- Select the "Paint Brush" tool - [b] key
- Settings: Shape: Round, Size:50, Hardness:100, Step:1, Density:100, Thickness:100,
Rotation:0, Opacity:100, Blend modes: Normal
- Using the guides to start your stroke and to end your stroke paint line as shown below.
You will notice that the guides will restrict your paint placement so your paint is perfect.
- Turn off the Guide display with "View menu/Guides" (This is a toggle on/off command)
- Using the magic wand select the white line as shown below.
- Settings: Mode: Replace, Match mode: RGB Value, Tolerance:20, No Feather or Anti-alias
- With the LMB click in the white area.

- Using the Flood Fill tool fill your selection with a dark grey (RGB 64,64,64).

- Let's set-up our guides for the next operation
- Delete the current guides by View menu/Change Grid, Guides & Snap Properties
- Select the "Guides" tab, check the "Delete guides" check box and select OK
- Create new horizontal guides at 40 and 67 pixels
- Select the Paint brush tool [b]
- Set the foreground color to a light grey (RGB 192,192,192)
- Top Line Settings: Shape: Round, Size:15, Hardness:100, Step:1, Density:100, Thickness:100,
Rotation:0, Opacity:100, Blend modes: Normal
- Zoom in and paint the top line as the guide keeps your line horizontal.
- Bottom Line Settings: Shape: Round, Size:5, Hardness:100, Step:1, Density:100, Thickness:100,
Rotation:0, Opacity:100, Blend modes: Normal
- Zoom in and paint the bottom line as the guide keeps your line horizontal.
- Apply a "Gaussian Blur" with Adjust menu/Blur/Gaussian Blur.
- Settings: Radius:2.50
HINT: The Blur gives our lines the effect of reflected light on a round bar.

- Drop a shadow with "Effects menu/3D Effects/Drop shadow"
Settings: Vertical:3, Horizontal:3, Opacity:50, Blur:5, Color: Black
- Add a Selection Border with "Selection menu/Modify/Select Selection Borders"
- Settings: Check Inside, Check Anti-alias, Border width: 3
- Fill with the Metallic gradient as we did in step 1.
- You can now delete your selection with [Ctrl-d]
- Turn off the Guide display with "View menu/Guides" (This is a toggle on/off command)

Step 3. Add the Text
- In the Layer palette LMB click on the Button layer to select it. (It should be on top of the stack)
- Select the "Text tool" on the tool bar or [t]
- Settings: Create as: Vector, Font: Gill Sans Ultra Bold (or similar font), Size:24, Anti-alias: Checked,
Alignment: Center, Auto kern: Checked, Leading:0
- Materials Palette Settings: Foreground: Disabled, Background: White
- LMB click in the center of the button and in the "Text Entry" dialog type "PUSH" then select "Apply"
- Place the cursor in the center of the text, it will become a 4-Arrow cursor then position the text

- Now convert the Vector layer to a Raster with Layers menu/Convert to Raster Layer
- Rename the layer to Text

- Change the opacity of the Text layer to about 44 (see below)
- To do this, LMC click on the double triangles and slide them left.

HINT: We could have left the layer as a vector layer but I wanted you to see how to convert to raster.
- This is our finished image. You have now used about 14 of PSP's many tools.

- If you have enjoyed this tutorial then email me. I work for peanuts, compliments and your input. |